


I have an obsession that I just have to share. Have you heard of fusing plastic using grocery bags? Have you tried it? I am addicted to it and have made oodles of little make-up bags and things with it. I just can't get enough of it. It's like creating your own plastic fabric.
I have lots of little holiday ideas to share with you this season. Starting with gift bags that have endless uses (plus will hold stocking stuffer treats). All you need are a bunch of plastic grocery bags, parchment or wax paper, scissors and an iron (and ironing board).
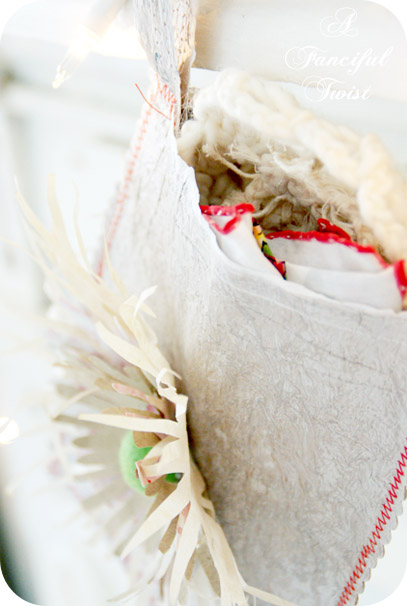
This little bag here is sort of the alternative to a traditional holiday stocking, so the recipient can continue to use it all year, in all of its green crafted glory 😉

I began my project by fusing plastic together. There is a great video tutorial for fusing plastic bags that you should watch, right here. I am not responsible if you burn something or hurt yourself, so pretty please, be careful 😉 – and make sure you do this in a well ventilated area.
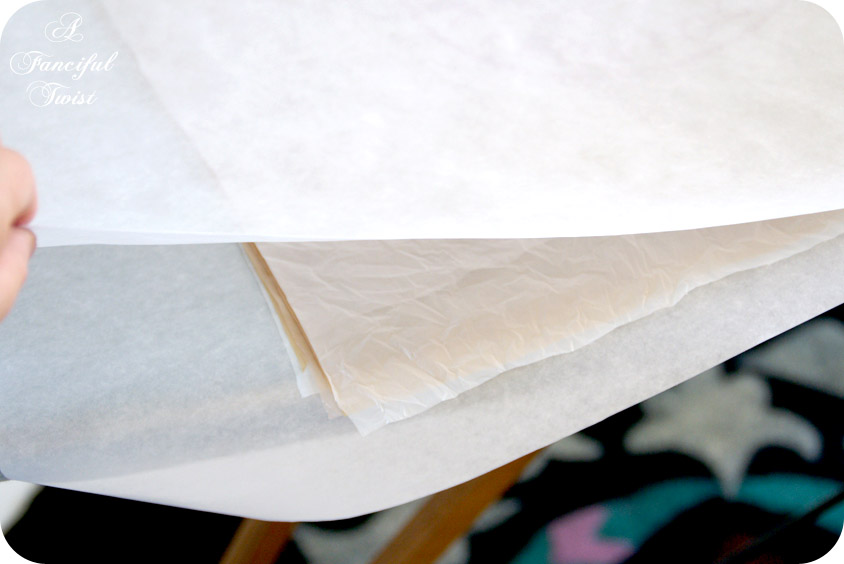
What you need are eight layers of plastic grocery bags, that you sandwich between parchment paper (or wax paper), and then iron with a hot iron on each side. Make sure you sandwich the plastic between parchment or wax paper, or you will have a mess of melted plastic on your iron and board.
What I do is cut off the bottoms and handles of 4 grocery bags, which makes them able to open up to a bigger size…

To get this grayish/beige color I used brown and white plastic bags. Make sure to turn your bags with print inside out, after you have cut the handles and end strip off.
Then put your eight layers of plastic in between your paper.
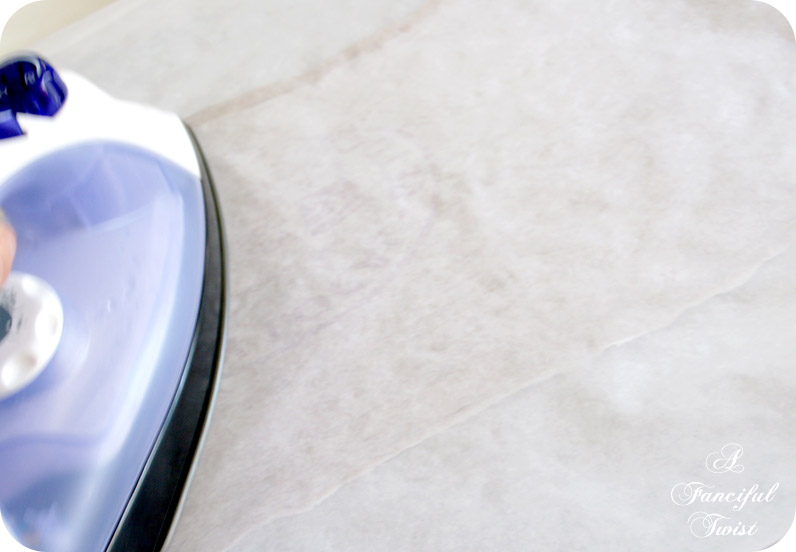
Start to iron your plastic over the paper, evenly. And here is where my tips get important. The first time I tried this I found out that, it took longer than expected to fuse the plastic together even though my iron was on the hottest setting. But, test this, as your iron might be calibrated differently than mine.
Also, the plastic will shrink more than expected, so don't be surprised at that because I was 😉
You may have to iron both sides more than once. That is a-okay. I just keep flipping it over and ironing until it is fused. And trust me, you will know when it is fused. It will be one solid piece of plastic fabric that will make you so happy you will have to do an Irish jig right there and then.
You should have no bubbles between your layers (you WILL have wrinkles here and there though, that is normal).
You can check it over and over as you iron, just be careful because the plastic is hot.
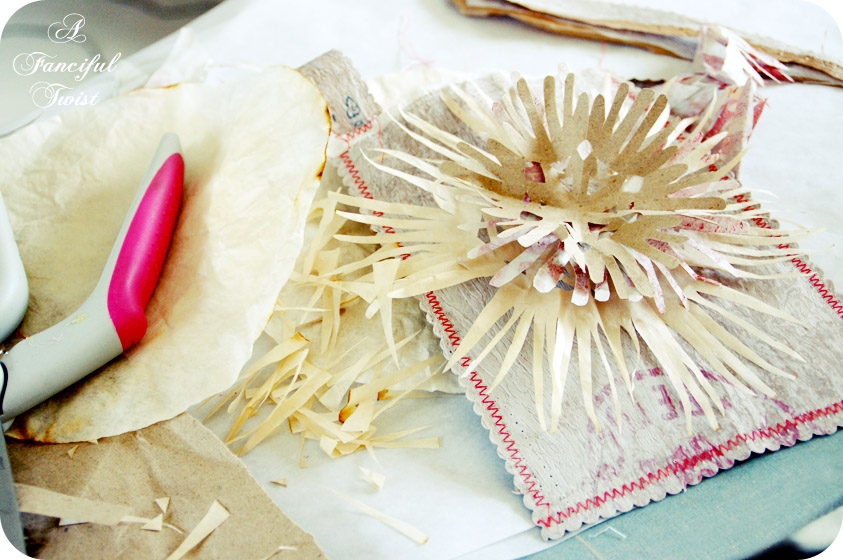
When you are done, you are left with this –
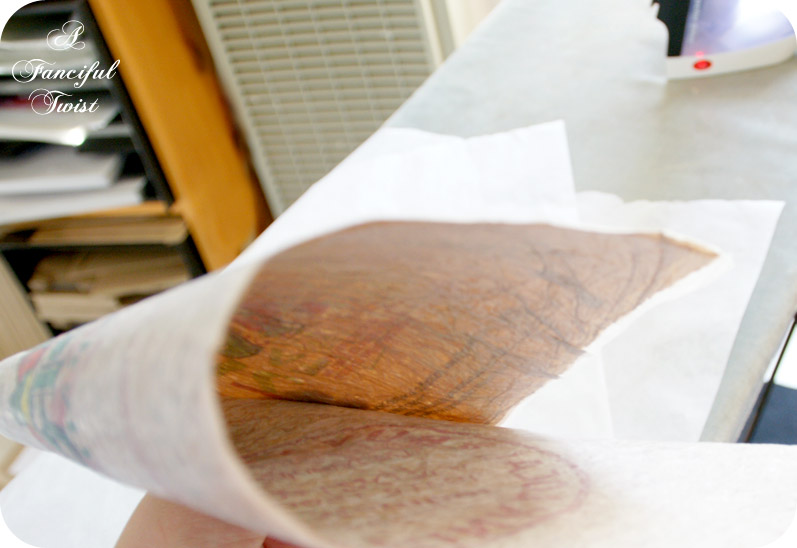
Bendable, sewable, cuts like butter – plastic fabric…
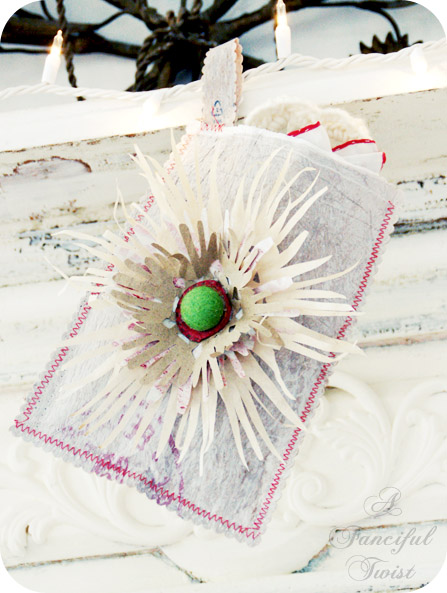
I folded my fused piece in half, sewed three sides together with the zigzag setting on my sewing machine, then trimmed the edges with scalloped scissors. I also added a little hanging loop on the side, made from the scraps I trimmed off after sewing.
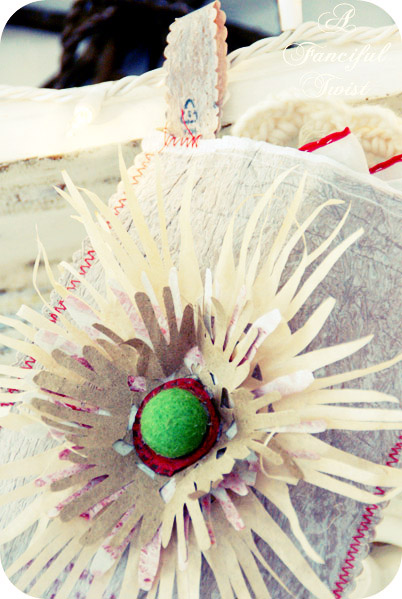
Once my bag was sewn and ready to be decorated, I made 3 paper flowers to embellish my bag with. I used some other fused plastic I had made, a brown paper bag scrap and a used coffee stained coffee filter (which I rinse, save and dry after we make coffee) to make the flowers.
To make similar paper flowers (or snowflakes), feel free to use the paper flower tutorial I shared with you earlier in the year, right here.
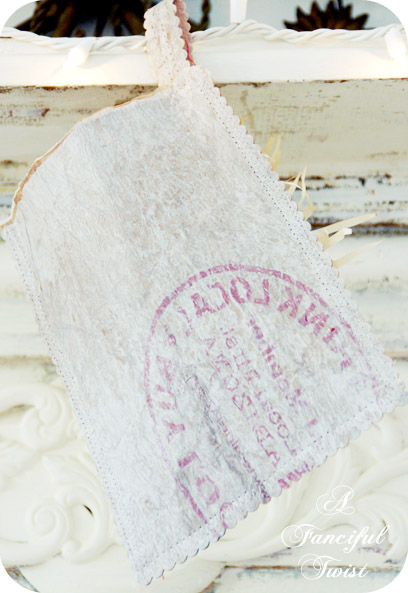
This is how the back of my wee creation looks. I love the print there. It makes it look like a burlap sack in a way…
My goal was to make a green craft out of trash really. Practically free, with a fabulous outcome. Of course, you can use anything you want to embellish your gift baggie.
You can even make an actual christmas stocking using fused plastic bags if you want. I chose this bag, which you can add a flap or zipper to, so that my recipients can use them throughout the year.
You will love working with the fused plastic, I tell you, it is so easy and plyable to work with, I just love it. (I have been experimenting with melting other items into the plastic as well as working on bigger projects. You can make endless items, just as you could with regular fabric, only this is waterproof! See example here…)
So, getting to the embellishing part. I hot glued the 3 paper flowers to the front of this gift bag, layer by layer.
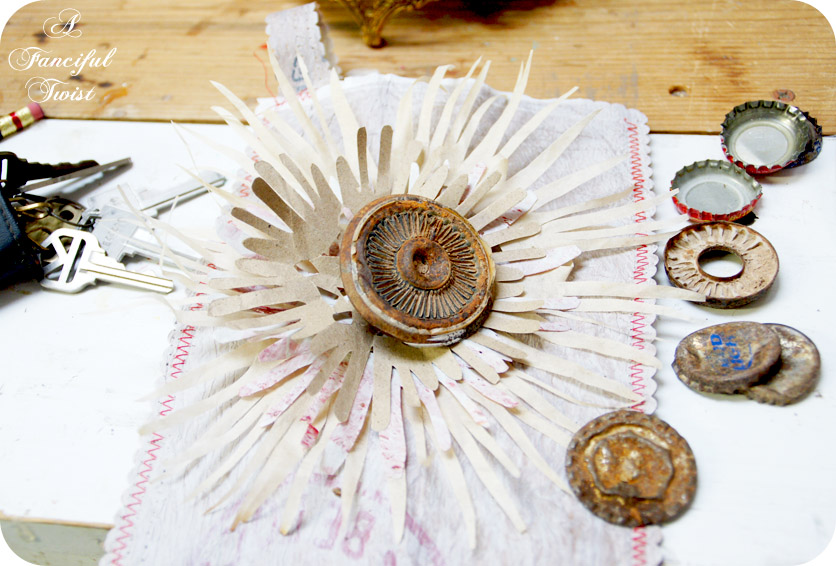
Then I raided my rusty things jar in order to find a centerpiece.

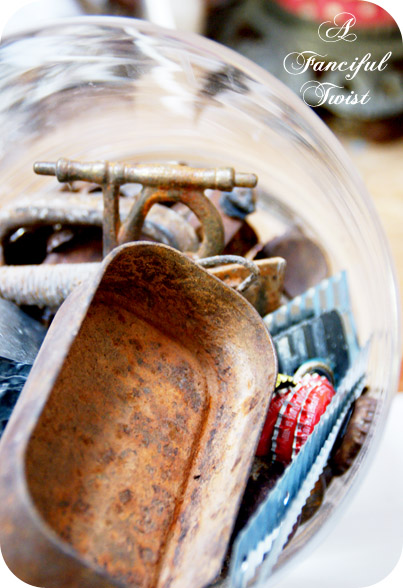
I chose a flattened red bottle cap, and then placed a green felt ball in the center. I hot glued them together as well. Pressing down on my center-piece inside and out to make sure it all stuck together well, and it did.
It was so easy and so much fun-

That I can't wait to make more!
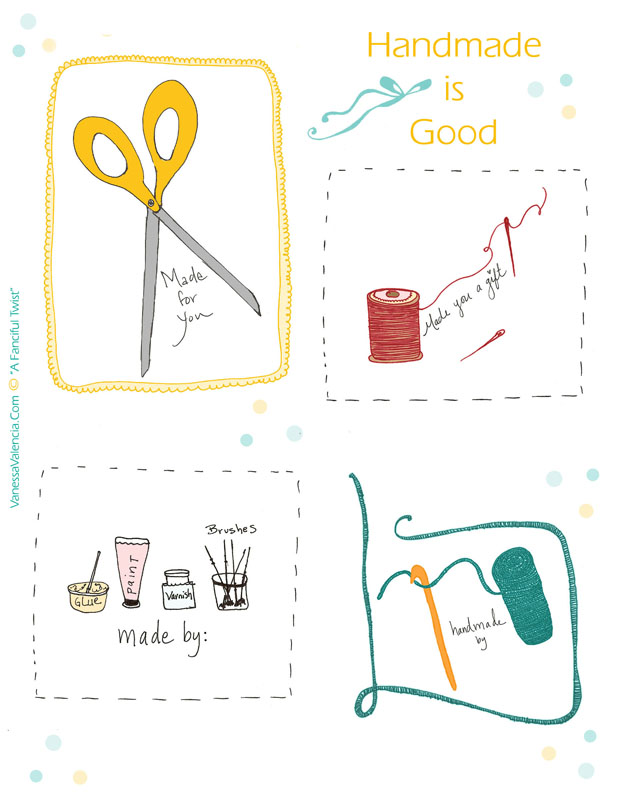
After you make your gift bag feel free to print out my free handmade labels to attach to your baggies. Don't forget, all my freebies to date, are kept in the freebie section of my blog, that is located in the right hand side bar.
CLICK HERE FOR PRINTABLE PDF of sheet below (give file a few seconds to open)
Also, if you say howdy in the comments section of this post, I will add your name to a hat-

Because I will be sending this little gift bag full of wacky little things to one of you 😉 – I will draw a name in a couple of days.
So, there you have it, our first fun craft for the holiday season. And green to boot!
With that I will skedaddle, but will see you ever so soon.
🖤 ,V


Lovely green idea, Vanessa!!! Thank you so much! And yes, handmade gifts are the best. 🖤
You are so clever! I love this plastic/paper bag. Where is everybody? ^00^
Thank you so much for the fun stuff you pass on to us bored people out here. I guess you could glue glitter on to it and punch holes for ribbons and glue your favorite doggie(s)
photos to it =) (Hopefully, people do this is a well ventilated area, just in case of toxic odors). I love your rusty things jar too.
What a neat idea. I just saw on another blog today something made of fused plastic bags. I will definitely have to try this! Thanks for sharing!
You’re right, it does look like nive vintage faded burlap! So pretty!
absoutly fantastic, love love love this !
There are so many wonderful elements involved in making this project. Thank you for sharing!
What a fun idea, Vanessa, I would have never thought of using plastic bags this way. Oh, and ofcourse, when it’s something you made, I love to throw my name in the hat 🙂
I’ve seen this done where clutch bags were made from it too. You can also add angelina fiber (which fuses with heat)on top or below the first layer for a bit of color…even glitter. It’s wonderful when new things can be created from something so ordinary. Great idea for the gift bag. This is something most of us have lying around because not all of us (me) remember to take cloth bags to the grocery…aND not all stores other than that use anything BUT plastic. Good reminder for a “green”project!
I haven’t been around blogland much but trying to get back in the swing!
XOXOXOXOXO
That is the coolest thing I’ve seen all day! Although I swear if anyone catches me with a stash of plastic bags they are going to turn me in to that “hoarders” show. I’ve already started saving coffee filters after you mentioned it awhile back (I love using those!) and some of the other things I hang onto? Well…my mom used to call me a “bag lady” when I was a kid because I saved and carried weird things around. Guess I never got over it!
oh that is fabulous!
What a too cute bag. I am off to try this, eeeh I love these sought of projects
Very clever idea!
~elaine~
This is the best idea ever. Even though it is 2:47 a,m, I’ll remember = and I’ll make a bag or two by evening.
Thanks.
wowzer, never seen or heard of it til now…thanks babe
%*_*% rosey
What a wonderful idea!
Very cute and easy. Thank you for sharing.
Howdy!! I especially love that the fusing process will compel you to dance a jig right then and there!! Love it!!! 🙂
wow! what a great idea! thanks for sharing this. I am going to try this right away! have a happy day!
Vanessa, you are amazing!!! This is so wonderful.
I am so excited to try this. Thanks for the great post.
I didn’t know that that was even possible! That’s a wonderful way to keep those bags out of the land fill and make something useful and cute at the same time Thanks for all of the great Ideas, you never cease to amaze!
~ Shelby Lynn
Wow! I just discovered your blog and it is amazing! I’m adding you to my blog list right now! Beth
🖤OH! What a perfectly lovely project, indeed! I was just reading about the Great Pacific Garbage Patch this morning……ugh…..how utterly horrific! Your pretty little earth friendly tote makes me feel a little better!
What a fun project, can’t wait to try it! (and jig!) <3
I am looking forward to trying that. Your flower on there is really good, really, really good. Love!
That is an adorable little project! So many creative possibilities there, just love it!
I have seen this done before but yours are some of the prettiest I’ve seen so far. Thank you for your wonderfu tutorial.
Wow – I should very much like to try this myself. Not only is it beautiful, but I am fascinated by its construction. Thanks for sharing that tutorial…I can be klutzy, so I shall make sure my Mr. is nearby in case of emergencies. 😉 Theresa
this is great. I can’t wait to try it~ I even have the iron out right now, should I take that as a sign? I am glad to read about layering things too, I was wondering about that.
I remember Evelyn Roth used to crochet with plastic bags……huge projects. She made car cozies and clothing. She also crocheted with used video tape. Love to recycle!
What a clever idea!! Love it!
Love making these bags, Haven’t made some in awhile. What an easy way to embellish them. Hope ya day is going well. Hugs~Poetic Dreams
Very cute! 🙂 I will have to give this a try.
Dear Fanciful V.,
You never cease to amaze me with all your crafty wonderments and creativity. And to think, I was just about to toss all those bags in the garbage, but this looks like too much fun!!!
Happy Monday sweet girlfriend. Now I’m off to work ;-).
Big Love
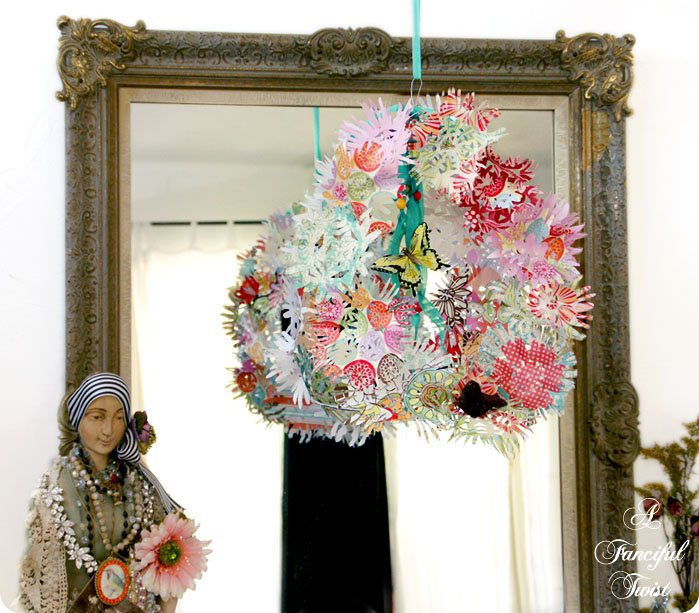
So, I got sucked in with all the tutorials (felt a bit like Alice tumbling down the rabbit hole 😉 ) – I love your magpie chandelier – and the flowers! I’m obsessed with flowers, so I definitely plan to do some experimenting. The wrist corsages are so fun and adorable, I’m just itching to make, make, make!
Oh yeah, this all started with your post about the fused plastic project…. Thanks so much!!!
so fun, you are the Queen of Craft Fantasy
LOL
Karey
Such a cute Idea ~ Thanks so much for sharing!
Good idea, and thanks for the tip, too. I especially enjoy those flowers! Those will definitely be used in a variety of ways… a couple of birthdays are coming up and I think they will be fo’ shizzle on some presents.
Say, you don’t want to pop Matisse in one of those stockings and send him over do you? No? well, worth a try! 😉
Have a good good week!
Candace in Athens
That’s amazing! I’m definitley trying that one out… Thanks for sharing! 🙂
I’ve heard about these, but had never seen them! Thanks for the ideas. I’m thinking of making these for all my nieces and nephews for the holidays!
Fabulous idea, Vanessa! Think of all the plastic bags that Won’t go to the landfill! So sweet of you to offer a giveaway, too! Have a special day! Twyla
OH SWEET!! I can’t wait to try it. I have tons of plastic bags that I just can’t throw out. Thanks for the great idea!
Tracy M.
OOOOOHHHH!!!!my grocery store hands out colored bags to match the seasons: orange at halloween. pink at Easter, sometimes, a pretty blue. I save them all the time because of the colors ! This would be a great way to use them. I love it !
You’re the best at sharing fabulous ideas! I will definitely try this out 🙂
Denise
Oh! See, now THIS is genius! The whole time I was thinking that I could use this to package my jewelry in when I sent it out to a new client! It is pretty, and recycled!
Genius, just genius.
Thank you SO much!!
Howdy – Love what you made! Adding this to my list of things to try!
Hmmm, this is very intriguing. I need to grab some plastic bags, head to the studio, fire up my iron, and … play!
Cool idea….I will give it a go!!! Your example is adorable!!! Definitely throw my name into that hat!!
Hugging you
SueAnn
How pretty! And I love that you save and rinse your coffee filters. Oh to be that creative first thing in the morning…
we loved your photos with the flowers!!!they gave us a feeling of quiet…great job!
we loved your photos with the flowers!they give us a feeling of quiet…great job!
i’ve just found your blog and i love this idea. i’ve always wanted to try it and now i’m inspired again. and i love that you have a jar of rusty things. i’m not the only one! but i need to label mine…..
I can’t wait to make this! What a great idea and something we always have too many of! I bought a little brooch at a craft sale…and you know…I think that’s what it is! I’ll have to send you a photo so you can see what you think! Thanks!
I am totally doing this tonight!!
I have just lost an hour somewhere! One minute I was reading your blog, the next I was lost in youtube land learning about this brilliant idea! thanks for sharing.
Adorable idea – will definitely give this a try!
I was giving my plastic bags to a shop that used them for trash. Yowee!!! Now I’m hoarding for me. What a great Idea and Great instructions. So many people post creations then leave one twisting in the wind trying to figure out how they did it.
Vanessa, I have been hearing a lot about this stuff and hadn’t been too wowed – until now! Your little baggies are adorable! I love your GreenCraft and cannot wait to try out the idea. Thanks for the inspiration and wonderful giveaway!
~ Autumn Clark
http://autumnsantics.blogspot.com/
You know I’d love wacky things in a beautiful bag! 😀
I’ve heard of fusing plastic bags but have been too scared of the fumes to try :-S
This is so fun V…I think I might make some gift bags this year like that! Thanks for the inspiration (as always 😉 And thanks for the chance at winning your fun loot!
Jamie 🙂
This is such a clever idea! I will have to add it to my list of crafty things to try! Thanks for sharing!
Hi! I just found you via Sew, Mamma, Sew. Your stuff is beautiful! Can’t wait to investigate your site further…
Omg that is a wonderful way to recycle…
Thank you
um, howdy! Thanks for sharing (-: I love stuff like this and I totally am going to try it myself (-:
Be well (-:
oh you sweet, sweet girl..thank you for sharing..I had heard about this project, but now I can do it..take care..
Oh I’m diggin’ this one!
BTW I’ve found that paper grocery sacks make the most wondrous journal pages. Just cut handles off and cut bag to size desired. Takes acrylic paints wonderfully and strong enough to collage! Bind with rings or sew it up!
My kids LOVE to make their own!
There are now at least 65 new converts to the art of fusing plastic bags I would like to bet! All around the world people have their irons set on hot and their fingers ready to peel away their creations! Such fun! Can’t wait to make something with mine. Thanks for the tip!
xx
V~
You are oh so creative…I LOVE THEM!!!!
So cool Vanessa. So cool.
Love Renee xoxo
I love this post! I have been so curious about this technique and the tips and video link really made it all so clear in my head….I’m jazzed at all the ideas I’m having…thanks for the Inspiration!
I think this is the coolest thing I’ve seen in ages! Ugly plastic bags into lovely, durable “fabric!” Awesome!!! Only problem is that I don’t have enough bags to experiment with right now because I’ve been using reusable bags for a couple of years! LOL!! I’m going to request plastic bags all this month so I can build up a stash to make fabric out of! Thanks so much for posting this. 🙂
I found your blog today through Sew, Mama, Sew and I think I am in love!!! Your site is so welcoming and cheerful I think I might just stay here all evening (and tomorrow I’ll be fusing plastic!) Thank you!!!
Hello Miss Vanessa,
Totally awesome tutorial! Love the bag!
~ Gabriela ~
Vanessa, what a great idea!!! I have to tell you that my 9 year old is about to make a “Young Author Book” in school and his topic is on Pollution. He can use any kind of paper or material for his book pages, I will have to show him your instructions and do some of our own plastic paper to see if it will work!
Thank you….
What a fantastic idea! Who would have thought that you could make those plastic bags look so cute? Well, who could have thought that anyone but you could have? 🙂
What a brilliant idea!!! I love it Vanessa… I need to get a jar for my rusty things so that they aren’t all scattered around… : )
Pattee
Oh V- You just continue to inspire and more…
Collecting plastic bags and then ironing them too! Making cuddle up bags for him and her without glue! Seasonal recycling, flowers with rust, oh V, you really do have a magic touch.
Sea salt and butter, and iron pans, time to cook Marsala and collect plastic bags.
i have been meaning to try fusing plastic bags…i have ever so many of them living in my closet….
thanks so much…you made me want to get right to it…:)
My plastic bags were starting to overflow in the cupboard where I keep them. So a few days ago I gathered them up and set them by the door to take to the grocery store to put them in the recycling. As they sat there, I was seriously thinking about fusing them instead of recycling them. Well, good thing we keep forgetting them when we go to the store. Now I am inspired to do some fusing. :o)
Howdy…I certainly will try this. I just started saving coffee filters for the purpose of making flowers. Love the idea of the plastic bags so much. Keep up the great work. Hugs. barb
Oh V,
Your ideas are so fabulous!!!!Thanks for all you do! BTW, I would be so excited to recieve a prezzie from you…hope you draw my name…
This is a really great idea! I love the look of it – who knew grocery store bags could look like that with a little make-over! I can’t wait to try it (after my husband goes to work, he already thinks I’m dotty).
I love the fused plastic bags! You are a genius.
Thanks for sharing your process – sooo simple, isn’t it?
I cannot wait to give it a try…
xo
Love this idea. I’m now heading out to the trash to fish out all the bags I threw out this morning! They are worth so much more now!
It’s amazing what we can do with “trash”! I’ll give it a try for sure.
Neat-neat-neat…now smarty pants, what to do/make with plastic bottles? Hmmmm?
;-P Cheryl
Always love visiting : )
Oooh, this looks fun, I might have to try fusing some plastic bags. I’ve got a million of them, it would be nice to find a use for them.
I’ve been wanting to try something like this for ages, I’m so going to have to give it a go now! Great job and I love the ‘Rusty things’ jar… I need one of those too 🙂
This is absolutely fantastic. I’ve not heard of this before and will definitely be giving it a try. In one of my posts last week, I talked about how a wonderful lady here is teaching ladies in the embassy shelters to cut plastic bags into strips which are then tied together and crocheted into totes, purses, etc. They are the sturdiest most wonderful items and such a great way to recycle, plus empowers the women who are learning a new craft. Thanks for sharing this! I am so excited to give it a try. I promise to be careful! Unfortunately, I have a painful burn on my right pinky from baking for charity a couple of weeks ago. And a gash in my index finger from cleaning the balcony in a frenzy. I do everything with zeal! HA! Blessings to you, Tammy
Hey! This is fabulous!!! Al last something serious to do with all those plastic bags I have stored. I will try to fuse different colours. Perfect tip to make christmas stockings. Thank you so much for sharing this! /linnea-maria
I’m up before dawn and trying to get my day started. I thought I’d surf around the Web a bit and found your wonderful blog. I have a ton of those plastic bags. I can hardly wait to try this!
I am promoting a handmade Christmas this year too! In fact, I just posted a few pics on my blog. It’s amazing all the different projects I’m finding.
woo hoo – my kind of project
now, if I ruin my Rowenta, I’m going to hunt you down LOL
I am definitely going to try this! Thank you for the tutorial!
GREAT TUTORIAL and such a wonderful idea to recycle something that is so UN biodegradable…Love your bag and the flowers are totally adorable. Thanks V!
Just found your blog- what a treat! Great ideas 🙂 Thanks for sharing with us!
Howdeeeee.. I follow your blog and have
had the best fun making our Halloween a
spooktacular one. The kids in the neighborhood help design ear of troll ,eye
of newt etc… We had a ball.Thank you
A creative and green idea, Lady V. You are just an endless bounty of creativity.
How tremendously timely. I do a regular swap with my sister-in-law, and for this month, she suggested we make purses from things that aren’t purses. And here is the answer to my searchings. Thank you so much for posting this.
How fun!
Oh, and I think you can fuse an actual piece of fabric to the bag (sort of like with “Wonder Under” or other similar fusing material). That would give you endless colors.
I could be wrong but…
I think I read somewhere that you can use plastic bags to fuse fabric together…
=-)
I cant wait to have a go at making this…though i’m sure it wont be as lovely as yours,i’ll have fun making it.
Gorgeous!! I just have to try this and your photos are as beautiful as ever…
i hope it’s okay to tell you i love you!!!!!!!! 😉
this is the coolest project… you share you ideas so thoughtfully & beautifully!!!
thank you, thank you, thank you!!! 🙂
Very fun Vanessa. I may have to try it for a stocking. I need to make a few for the Aged P’s!
Erin 🙂
That is so neat! Now, do you leave the wax/parchment paper on the plastic? How did you get the neat design – is that just from the bags? I’M SO INTRIGUED! LOL I’m planning to make all of my holiday gifts this year, and I totally love this! Can’t wait to see what else you post in the coming weeks.
<3 your blog!
Great! You are so creative and it’s great that you share with those that might be a bit challenged in that area…like me! 🙂
Thanks for the inspiration, will go collect interesting plastic bags!!
You are such an inspiration. Can’t wait to see more ideas from you! Thanks for all your creativity.
What a great idea! Ideas are flowing through my head!
My husband will be SO happy! Now I have a REAL use for my 4 or 5 bags full of other plastic bags!!!
Thanks for sharing such a wonderful green idea! I’m a little green w/envy that I didn’t think of it myself 😉
wow! thank you so much for sharing this!
i really can’t wait to give it a go.
have a great week 🙂
gigi
i love your flower and litle bag. I tried iron plastic bags got sick but maybe I will try again ,,they are so cute
Wow – What an amazing project!! I can’t wait to try it – good thing I have tomorrow afternoon off! Thanks for sharing!
Absolutely brilliant idea (but you are full of those, these days!). xoxox
WONDERFUL wackiness! Thank you for sharing!
this is incredible! i’ll be flying this holiday season (so I can’t pre=wrap my gifts) and am looking forward wrapping all my gifts with these bags. so easy! thanks for this great idea.
Hello Vanessa,
my mom does my ironing…. but I must get out my iron to try this. I guess I have more fun in ironing plastic bags and turning them into something new !
You should send this post to ” greencraft” of Stampington to be published. They look for articles and this one is a perfect one and it would make ironing much more fun 🙂
greetings from belgium
Inge
Can’t wait to try this. I see snowflakes in your flowers and am feeling tis the season to craft! Thanks!
oh, no…i’m afraid you probably gave me a new obcession! LOL i can’t wait to give it a try, just as soon as my iron is hot! thanks so much for sharing!
lani 🙂
howdy girly, wish you would post a decorating tutorial room idea for the holidays using what little things one might have or find. You are able to create such divine designs along with great color grouping. We need help ugg make our homes pretty too…teehee!
completely beautiful and inspiring! thanks!
I just recently discovered your blog because of the Halloween party and I love it! Your art is so great and this idea is really useful (I have dozens of plastic bags lying around).
that is the coolest idea ever!! I have hundreds of those plastic bags, my husband is going to be amazed and probably a little worried, ha.
This makes me soo giddy! I can’t wait to try it!!!! I am so glad you showed us this and thanks for the fun everytime! Blessings.
I have done a few projects with fused plastic. But I love to see what beautiful projects other people come up with.
So neat! I can’t wait to try this out- what a great way to use up plastic grocery sacks. Thanks for the tutorial!
Thanks for the tips…my first attempt last year was not successful, I will try again! Love the little bag and flower!
how clever!!! I have just learned about fusing plastic but haven’t seen anything made with it. this is sooo clever and i LOVE the flower. Will definitely be making a number of these bags and flowers for holding Christmas presents so it will be like be like getting two gifts at once. Thank you so much.
Pat
I just found your blog through one pretty thing. I love this tutorial but even more, I love the way you write and your fun comments as you go! Thanks for this fun place to visit.
Well, the plastic worked!!!!! I will make it into something pretty soon, but wanted to stop and tell you I did a thank-you post for the inspiration you gave me and to show you my appreciation! Blessings dear.
This is SO cool and i cannot wait to try it!! thanks!
Well, little Miss V, I missed my chance at your giveaway, but I loved your tutorial. Your photos are great. I have wanted to do this, and tried to imagine what it would look like with the printing still visible, and it looks SO cool! You think of marvelous things. I have made your paper flowers and they’re really fun. You can have hundreds in just a little while!
xo
great little fused bag project. love the idea of using it instead of a stocking.
FABULOUS!
I tried this and it turned out pretty well for my first time. Such a fun (and earth friendly) craft!
Blogs are so informative where we get lots of information on any topic. Nice job keep it up!!
Really artsy stuff.. Your really good at it. :0
I want to try this. I never knew u could save coffee filters! Thanks for sharing. I love crafting! I am a great grandmother, And love being creative
How beautiful flower they are,we loved your photos with the flowers!!!they gave us a feeling of quiet…great.
Happy Friday! I love this! I featured you today on my blog toptwentthings.blogspot.com I would love for you to stop by and grab a button!
Amanda
What a wonderful idea! I plan to make 25 Christmas stockings for my family for Christmas, and I think this just may be what I’m looking for!!! I came across your site just by accident, and plan to be a regular visitor! Thank you so very much!
Thanks for the tutorial. I will be trying this technique soon!
Thanks for sharing the steps, can’t wait to try this.
Thanks for sharing such a great idea & tutorial! You have inspired me to try it myself and I made a pencil case using old plastic bags!! I have included a link back to your post as well 🙂
http://buttonsandpaint.blogspot.co.uk/2013/08/Plastic-Bag-Pencil-Case.html